Thursday, 27 November 2014

It's a Givewaway!!! Documenting December 2014

December is almost here and I'm excited. Nearly time to start adding 
photos to all the glittery gold that is my album.  
But before that happens, you have the opportunity to
WIN 
some of that absolutely gorgeous gold I've been so privileged to work 

This super fantabulous giveaway is very generously sponsored by The Stamp Spot.


The wonderful Michelle from The Stamp Spot has created 3 exclusive to The Stamp Spot Christmas flair badges.  


Aren't they just gorgeous??  And they could be yours!!!


Now for the nitty gritty... How to enter!
It's super simple, you just need to comment on THIS blogpost with your favourite thing about Christmas - it could be a tradition, festive memory or something you're looking forward to this year.

I'll read the comments and select a winner. The winner will be chosen on Sunday, 30th November 2014 at 8.30pm CDT and will be announced immediately here on my blog.

If you are the winner - woohoo! - you will need to contact me within 24 hours via email to theingos AT bigpond DOT com to arrange delivery of your goodies.

The fine print...
  1. This giveaway is open to Australian & International residents.
  2. Only comments on this blogpost will qualify for entry.
  3. If the winner fails to contact me within 24 hours, I will re-draw and announce a new winner on Monday, 1st December 2014 at 8.30pm CDT.
  4. Your prize will be sent from The Stamp Spot via standard postage with Australia Post or airmail for an international winner.

So... get commenting below.  I can't wait to read all about your Christmas memories, traditions & excitement for the season. 


Once again, thanks for visiting me.


Saturday, 22 November 2014

Tutorial - Printing on Burlap - Documenting December

There's one sure thing with a kit - it's bound to include some things which aren't are your usual list of supplies. For me it was a gorgeous 3x4 piece of burlap included in The Stamp Spot main kit. I was worried it could be my undoing *of sorts* but I really wanted to try something a little different with it.  

Since it is not something which I would normally use, I did lots of research in Pinterest *gotta love that place*.  I came across a great post by Megan at Spare Time Measures which showed how to print on burlap using my inkjet printer.  I figured... why not! After all, I could only muck it up :-)

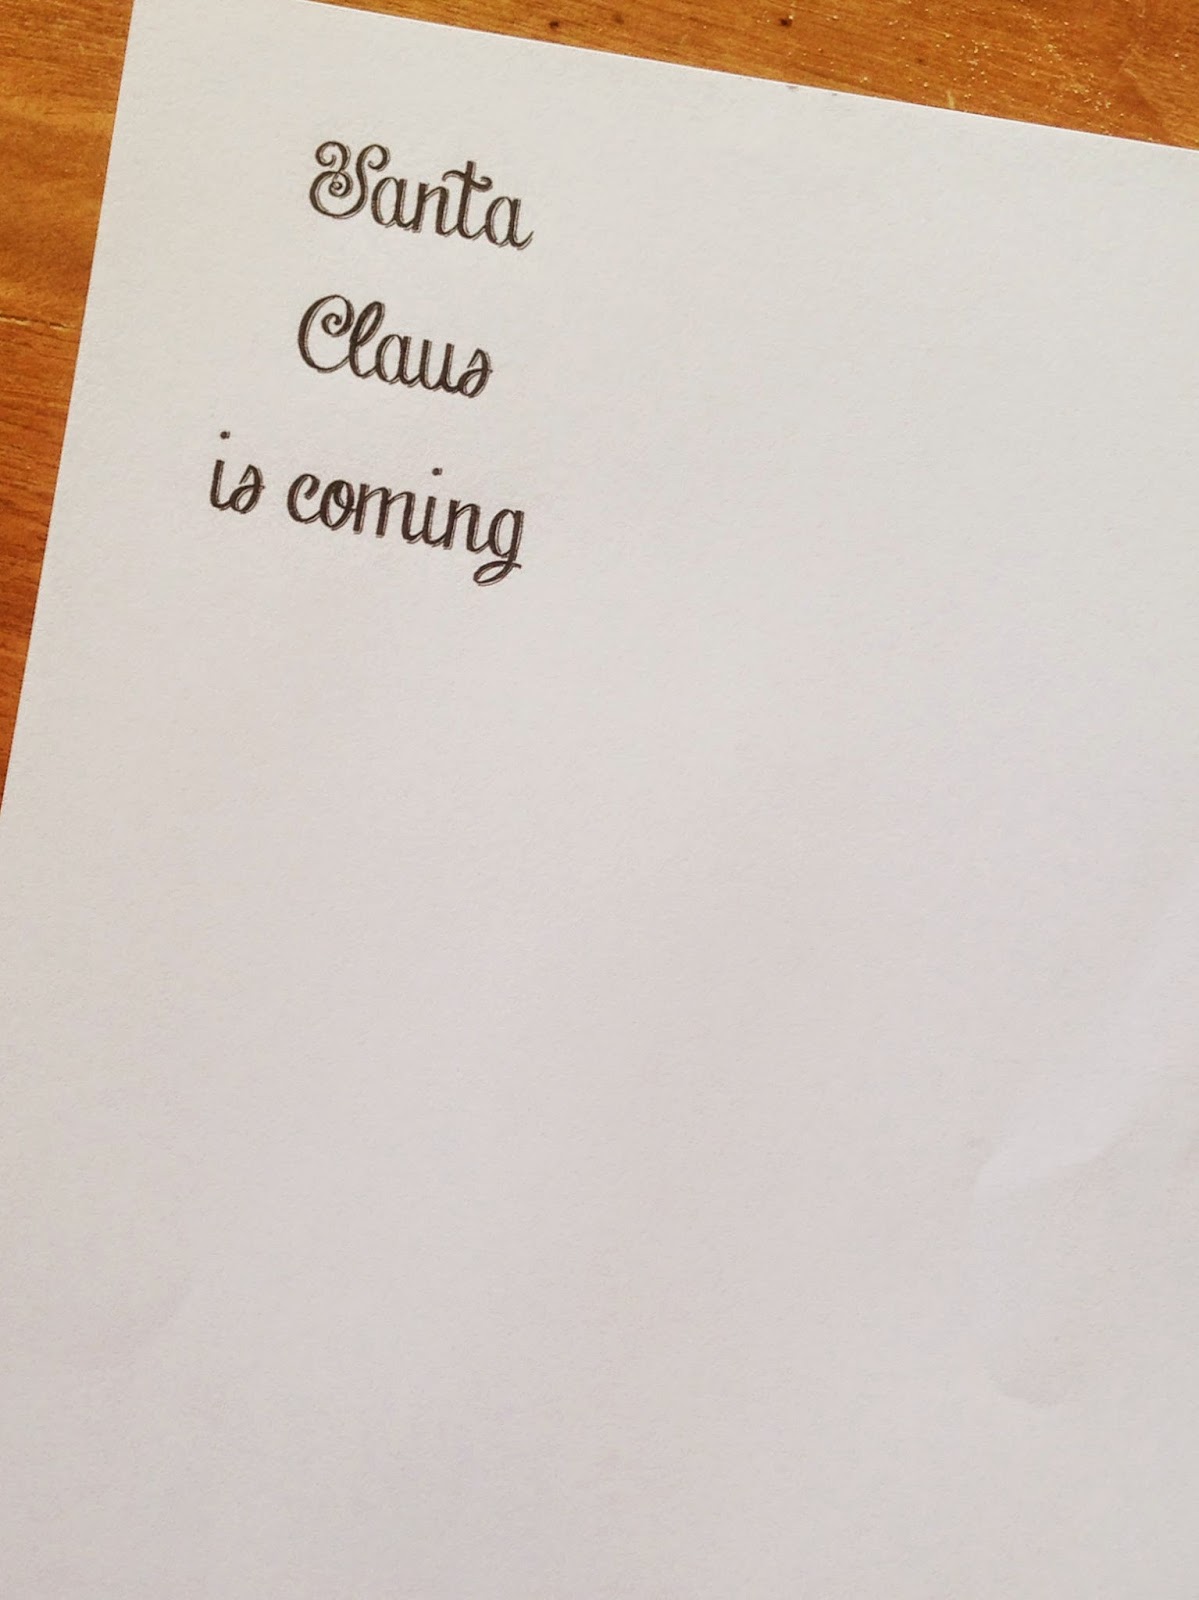
1.  Create your words/image in Microsoft Word.  I used a chalk board font which I love.  Use page setup to define your margins so you get the right size for your burlap.  Once you're happy, print it out to check placement, etc.  You may need to fiddle with this a bit and a few prints might be required. Keep your final print out.

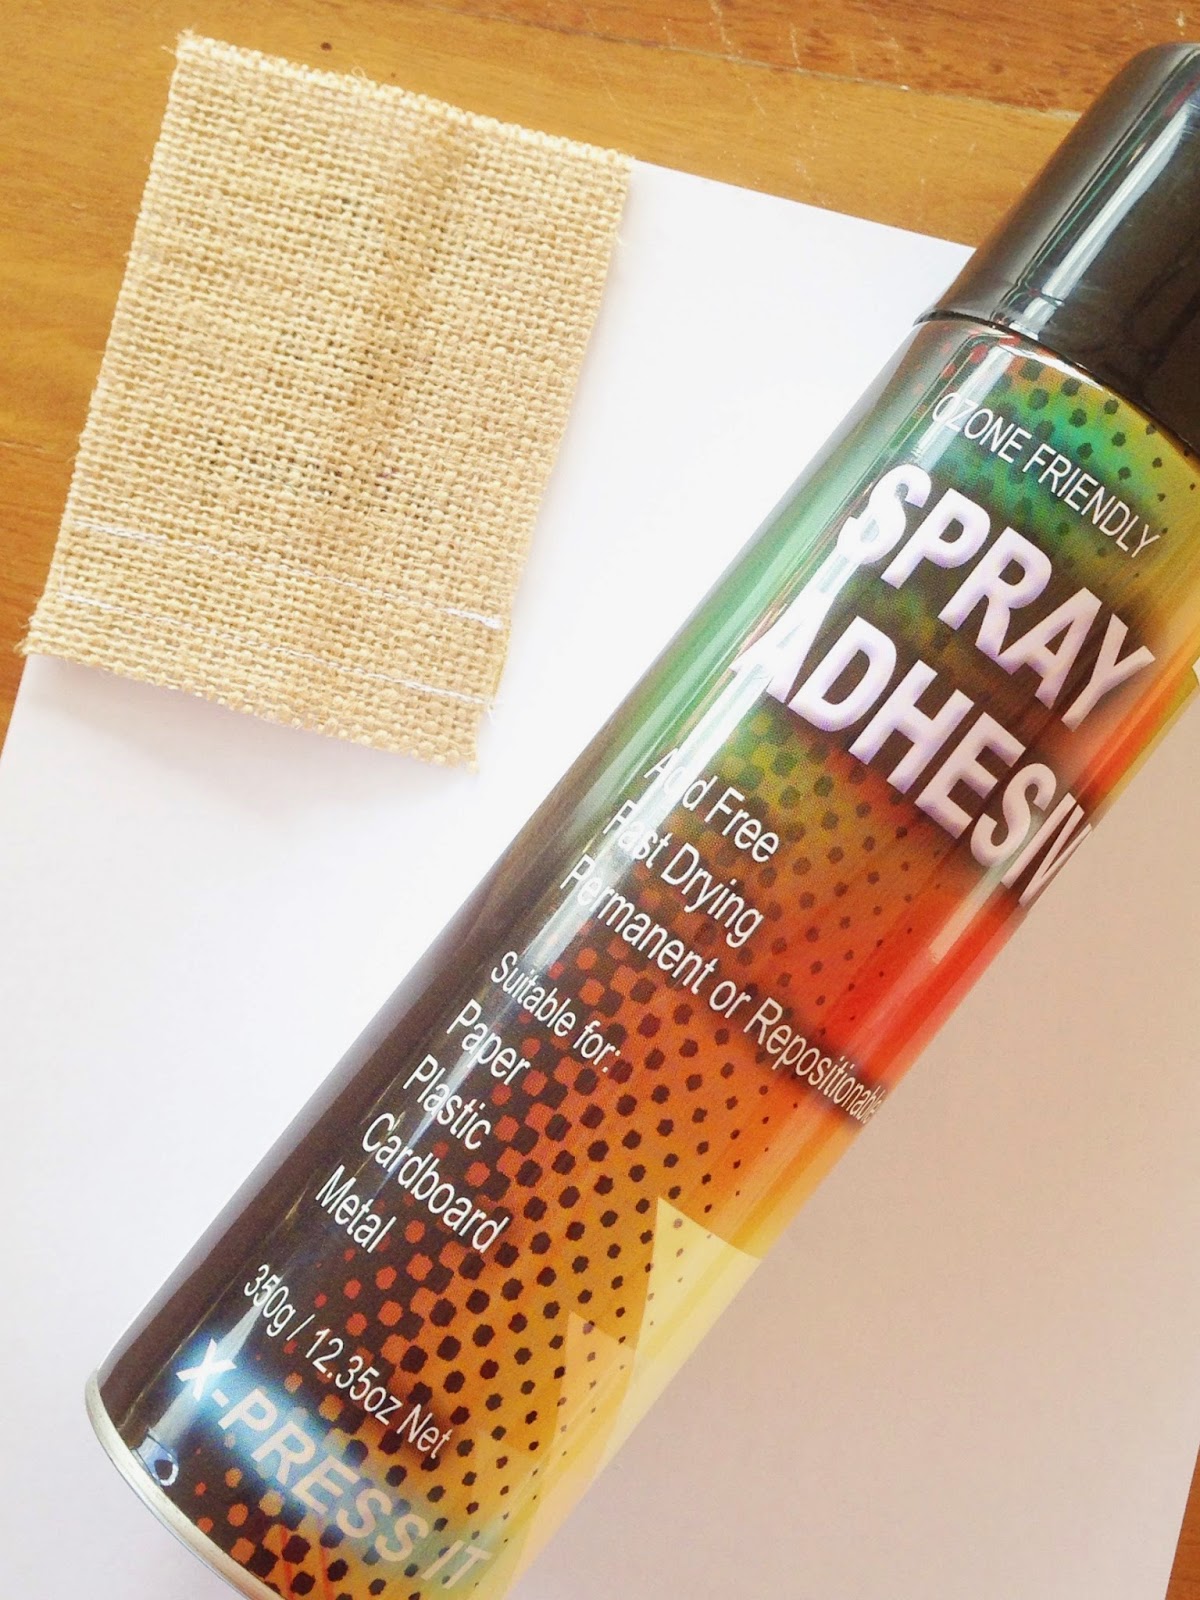
2.  When you are happy with your Word creation, spray a layer of Spray Adhesive straight onto your burlap.  It will need to be a reasonable layer so it sticks to the paper.  If it doesn't stick, just spray a little more adhesive. Stick the burlap over the top of your words/picture on your final printout.  This ensures it will print in just the right spot.
3.   Place the paper & burlap into your printer feed tray.  Make sure it is in the correct spot to print on your burlap (ie for my printer the burlap piece needed to be upside down and head first into the feed tray).

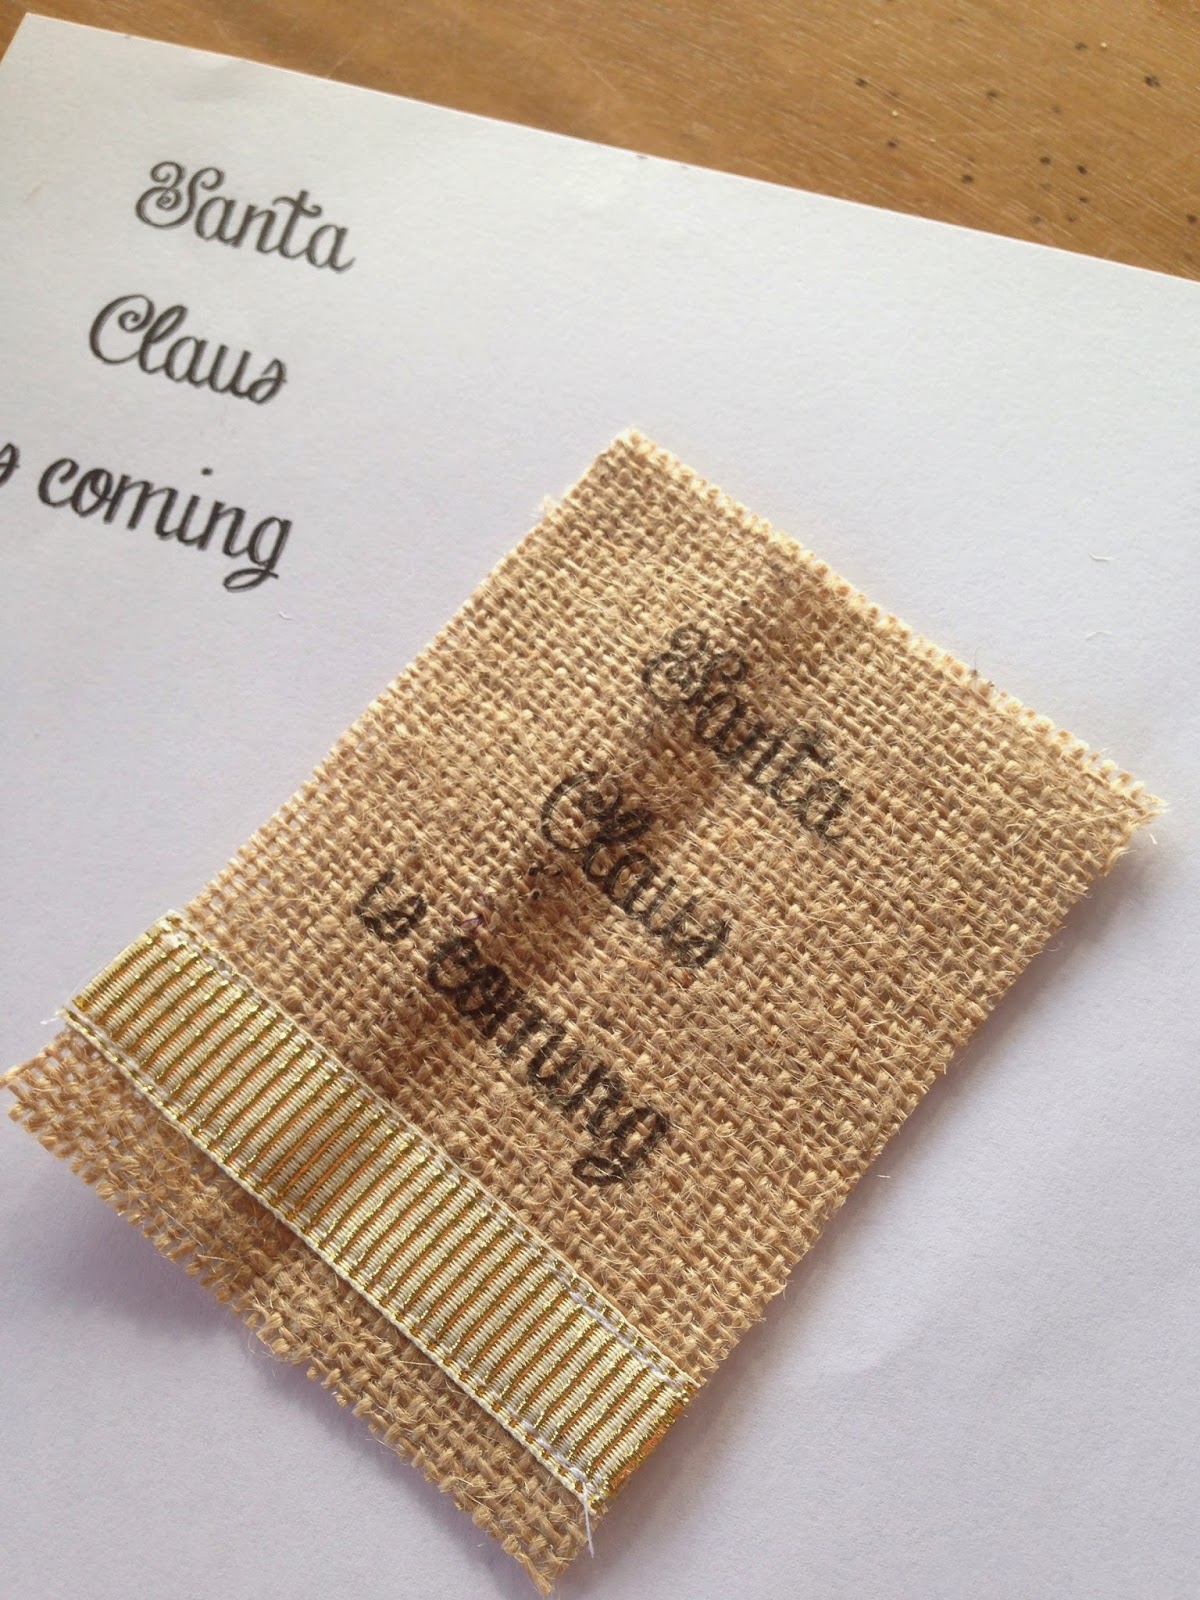
4.  Press print & presto *hopefully* it has worked!  I finished my burlap piece off by machine stitching a piece of gold ribbon across the bottom.  A small disclaimer, of course.  This may not work with your printer, but it was no problems with mine.  I use a HP Photosmart 7520.  Good luck!  I'd love to see your creation if you use this technique.


Thanks for stopping by to check out my December Daily progress.  I'll keep you updated with more photos of my foundation pages as they get created.  I'll also be posting to instagram so check that out too.

Also, keep  an eye on The Stamp Spot blog to be inspired from the other DT members.

Have a great day,


Documenting December - Foundation Pages

It's all go now for Documenting December.  Below are some of my foundation pages which I have created for The Stamp Spot Documenting December DT.  I'm somewhat ready for December to hit.   This is my first December Daily and I'm pretty excited.  I'm *hoping* that all my preparation will make for fairly smooth *yes, I say that loosely* scrapping in December.

I'm using the main - gold, white & kraft - kit as well as the red & teal add on kits.

Some pictures of my foundation pages:

Cover Page: This is my cover page. The photo is my focal point and I worked around that. I used a 6x8 page protector that I machine stitched into different pockets.
This is my cover page. The photo is my focal point and I worked around that. I used a 6x8 page protector that I machine stitched into different pockets, really wanted the shaker pocket!  This page is all from the TSS kit except the glitter red card at the top.  I have covered the button on the tag with washi from the red kit.

Day 8:
 This page is all from the TSS main kit.  Michelle created the 'joy' vellum card and the gorgeous shaker card. On the last card I have added a gold paper clip and used a Heidi Swapp PL stamp on a tag.  The number is also from the TSS kit.

Day 9:
 
All of the cards on this page come from the TSS kit and are from the Teresa Collins Tinsel & Co collection.  I have stamped a Kellie Stamps sentiment on the tree and added a gold foil and wood veneer star at the top.  On the 'believe' card I have coloured the letters using Heidi Swapp gold colour shine.

Day 22:
Apart from stamps, this page is all from the TSS kit.  The card on the top right is a piece of vellum which Michelle had already gold embossed.  I just added some Heidi Swapp stamps. And of course it will be a happy day - it's December!  The oval card started off as a sticker then I sprinkled some talcum powder on the back to remove the tack. I used my craft knife on a piece of gold washi to trim it to be thin washi.  I stamped the gold stars on the tag and added some gold/white twine and some sequins.  Lastly I have mounted the 'twinkle' sticker.  I'm really happy with how the oval pocket turned out.

Day 24:
All of these cards are from the TSS main kit.  The reindeers are a piece of printed acetate with washi & a sticker added.  The number card has a white cardstock base with washi tape across the corner.  I have used Heidi Swapp gold colour shine on the doily and also edged it with the gold ink from the kit.  The burlap piece I printed on with my inkjet printer (check out my tutorial) and I have machine stitched a piece of gold ribbon on the bottom.

Day 10:
 
The pocket card was created by Michelle and is from the TSS teal kit.  I have created a tag from white cardstock and added washi from the kit to the top.  The gold sticker is from the Freckled Fawn December Embellishment kit and the stamp is from Kellie Stamps.  On the outside of the pocket are enamel dots & a sticker from the kit.  The number is from the Freckled Fawn kit and under it is a washi covered die cut circle.  The other pocket is only that one circle on watercolour paper.  The stamp is from Kellie Stamps and I have used Tim Holtz distress markers to water colour the circle.  On the back of that circle is one of the TSS kit exclusive flairs.

Day 6:
  

I love the idea of being able to see through from one page to the next. To achieve this I'll be using lots of vellum, acetate and sequin pockets.  Another way I've done this is to sneak in a 4x4 page protector.To make it fit my album I've glued a piece of acetate along the spine and punched new holes.  It probably won't be the only one to make it into my album. :-)  The enamel dots, twine and vellum dot paper is from the TSS teal kit *and I just love it*.  The doily, stickers, tag and star sequin are from the TSS kit.  The stamp is from Heidi Swapp PL and the number from the Freckled Fawn kit.  I just love how this page looks.


Thanks for stopping by to check out my December Daily progress.  I'll keep you updated with more photos of my foundation pages and I'm planning *hoping* to blog at least every second day once December hits so keep checking back and I'll be posting to instagram so check that out too.

Also, keep  an eye on The Stamp Spot blog to be inspired by the foundation pages from the other DT members too.

Have a great day,


Documenting December 2014 - Getting Ready

It's well into November & I am like a busy bee getting to ready for my first Documenting December project!

I first saw the December Daily phenomenon in December last year. And I was blown away by the concept. I wanted to have a go at it but it was already the crazy season & I was overwhelmed by where to start. So I decided that this year I would get in on the act. The amazingly talented Ali Edwards originally created the December Daily idea, check out her blog for more info.

To make it even more exciting, I have been very fortunate to team up with the gorgeous Michelle from The Stamp Spot as a member of her Documenting December DT Team. *woohoo, go me!!*  Michelle released a main kit full of gold, white & kraft - just dazzling really - and lots of add on kits in a variety of colours. And they are all full of sparkly goodness. With great difficulty, I managed to narrow my kit selection down and will be using the stunning main kit as well as the red & teal add on kits. Check out Michelle's blog post to see all the beautiful details of the kit.

I was pretty excited to receive my kits *read running around the house with my shirt pulled over my head like a soccer player* and set them up just so I could stare at them!


I have joined my 3 kits together in this little wooden box which has compartments built in, just perfect for all the pretty bits.


Some of the kit bits I can't wait to use are the balsa wood, burlap and the doilies.  I am so loving the shaker pockets Michelle has handmade.


I also managed to snare the Freckled Fawn Very Merry December Embellishment kit from Michelle too.  Because you can never have enough embellishments!!!  There is quite a bit of winter specific in the kit which just doesn't apply to me, so I've picked out the bits that will work for me.  The rest will go into my PL bits.


My album of choice is the Snap! Teal & Kraft 6x8 binder which I also got from Michelle.  I haven't started on the cover yet, so it still looks just like this! 


And lastly some other bits I'm using from my own stash - stamps (Heidi Swapp Project Life & Kellie Stamps, sequins, colour shine (in gold, of course!) & rhinestones.


In addition to the gorgeous patterned paper in the kits, I'm adding some white & kraft card stock, gold, red & teal glitter card and some extra patterned paper from Teresa Collins Tinsel & Co range.  All of these are in 12x12 size which I'll be cutting down to size as I need them.

I've started doing my foundation pages and will share pics of these soon.  In the meantime, check out The Stamp Spot blog to see pictures of foundation pages from all the DT team.

Are you doing December Daily this year?  


Wednesday, 22 October 2014

Layout - She...

And my final traditional layout in this set.  And it is already a favourite.  Lots of bits in this one, so I hope you're ready :-)

Okay, so I had this instagram photo of ME that I was ACTUALLY happy with... now that doesn't happen everyday!  So I actually made it to a scrap page.  Seriously people, wonders will never cease.  And I tied it in with a great quote that is pretty fitting for me at the moment - She turned her cant's into cans and her dreams in plans.  Yep, it's a bit special.


Right so I discovered the new Prima Epiphany Collection at my LSS and it pretty much jumped off the shelf at me.  Yes, I do believe patterned paper speaks to me!  Which kinda accounts for my oversupply.  Anyway I grabbed two sheets of  the gorgeous Prima.  One is the background piece and the other was perfect for fussy cutting - birdcage, pocket watch, key, butterflys and layering under my photo.


I added a large shipping tag with lots of layers.  First layer - a sheet of old book paper coloured with distress inks - crushed olive & frayed burlap plus a birdcage and bird stamp.  Then I thought what the heck & sewed a piece of scrunched tulle straight down the centre of the tag.  On top of this is a pearl flourish from Flourish with a Bling topped of with some butterflies.  Yep, I told you, lots of layers.

Now, the butterflies... two were fussy cut, one stamped & coloured with watercolour pencils and the
other 3 were die cut, coloured with a distress ink blender (randomly it was frayed burlap, crushed olive, peacock feathers, vintage photo & spiced marmalade - I felt a little like Tim Holtz) and then a Prima script stamp used.  Phew.

While it's a lot of stuff, its not heavy looking.  At the very top of the tag is a fussy cut birdcage & a Freckled Fawn wood veneer.


On the other side is the quote title, some Prima & Kaisercraft flowers, a doily almost hidden under it all and a so cute, I just love it, birdcage charm.  The large Prima flower & Kaisercraft roses were given a watercolour from my trusty distress markers watered down.  The other Prima flowers got hit with some chartruese Hedi Swapp colour shine.

And the title is a combo of things - chipboard letters coloured with antique bronze distress paint, chartruese colour shine & then the Prima script stamp over the top.  The Prima letter stickers were also stamped with the script stamp.  And finally my trusty typewriter made an appearance for the remainder of the quote.

The final finishing touch is some die cut butterflies layered over the top of the butterfly pattern on the paper.  And that is it from me today.


Hope your day is a great one,
Gabby

Layout - Icecream Faces

Continuing on with my traditional layout creating.  Like a maniac really!

I took a gorgeous photo of the kids with my iPhone 5c at Maccas, as you do.  And was reminded again how gorgeously blue their eyes are - mine a hazel, hence the envy :-)  And I really wanted my layout to capture their delight for the special treat of icecream cones.


I just love this paper from MME... for me it just says fun & kids & summer.  Well... icecream is kinda summer :-)  I added some random Kaisercraft stamps in Archival Ink - Watering Can and also used a Heidi Swapp stencil & mustard colour shine.  It just gives it that little extra shine.  Some of the stencil shapes were outlined with my good old Pumice Stone distress marker.


I layered up some Prima & Pink Paislee paper, shipping tag, a chevron printed glassine bag from D-lish Scraps and some to die for bokeh vellum from Websters Pages.  It is seriously so great. *just can't get enough*

As for embellishments... I cranked up the Silhouette Cameo for the title - forget how easy & great this machine is! #reallymustuseitmore  Had some matching brads from MME which also got a guernsey.  I'm a fan of bending the spokes till they break off then attaching to my page using glossy accents & foam dots.  Other bits are Heidi Swapp ephemera, flairs & sticker and a little ticket from Fancy Pants that was just perfect for this layout.  The cork frame is a little 'corker' from Freckled Fawn.

Add in some other bits from my never ending stash... mini brads, twine, plastic dots, staples.

And that's it for this one.

Have a great day,
Gabby

Layout - Rainy Days

Last week someone asked me to photograph 6 or 7 of my layouts.  And I went into panic mode.  I've been doing heaps (ok, mostly) pocket pages lately & didn't have many *great* traditional layouts.  So I did what any sane scrapbooker would do - I started creating!  Madly!  And ended up with 3 layouts I'm pretty darn happy with.

This is the first - Rainy Days are Awesome.  And yes, they pretty much are when you're a kid.


My papers of choice in this layout are Heidi Swapp - Today, Mixed Company & Dreamy.  Added in is a floral sheet from Amy Tangerine.  From this I cut a polaroid frame and also fussy cut some flowers.  For my title base I used a Project Life card.


And the pretty bits are also from a variety of sources - because that's how we roll.  Some gorgeous Heidi Swapp Today ephemera & stamp, wood veneer cloud & letter stickers from Prima, wood veneer word from Freckled Fawn.  All the other gorgeous bits are from the June D-lish Scraps Just Add Paper kit - ticket tag, yellow roses, flair, string, butterfly pin, washi tape.  And my trusty secondhand, side of the road typewriter managed the journalling strips.

And for a little bit of extra special there's pink sequins from D-lish Scraps & black Heidi Swapp colour shine splatters.

What am I loving about this page? It's a fun layout with lots of bright colours and it matches the great memory & happy faces of my kids.

Have a great day,
Gabby